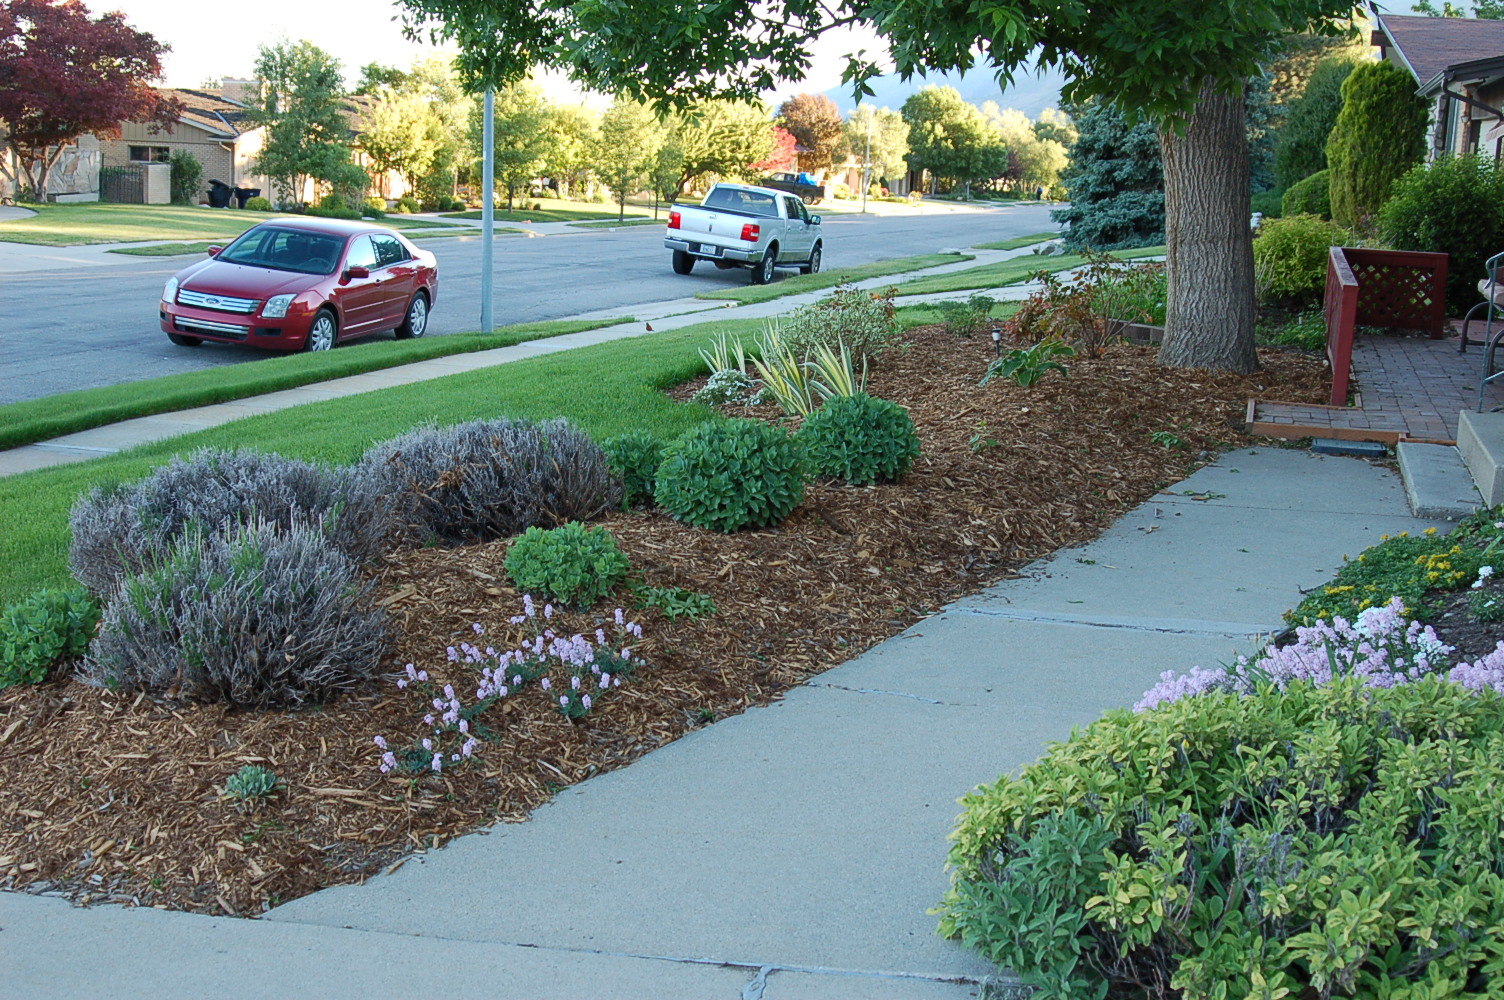
 The house is still quiet, and our cat, Piggy likes to stay close by. Right now she is laying on the desk next to my computer, purring and happy to have company. While Christine is still travelling and having a whale of a time it seems, I have made some progress on my current big project. It is one that I started last year when we were thinking it would be nice to have room on the side of the house for, well, maybe, a camper or something like that. Unfortunally, there was a lot of dirt in the way... So I began to dig it out and put it other places, like in front of the house were we now have berms were grass once grew. Well, it still thinks should grow in parts of the new berm area, but I keep telling it now. First with Round up, then with a hula hoe. Last week I howed up, or at least discouraged the latest grassy upstarts, applied Preen weed preventer and covered the whole thing with about 14 bags of cedar bark mulch. It looks nice don't you think?
Then it was back to work on my other project...
 |
| this is the post next to the water pipes. also next to the block wall which is scattered around |
 |
| new gate installed |
 |
| gate posts in place and wall put back together |
I had removed part of our fence and gate, which needed to be reinstalled in a new location. So this week I got to work.
  |
| done and stained! |
So that meant taking down part of the block retaining wall and working on a reroute of the sprinkler lines. That meant dealing with leaks, more mistakes, and more time. Oh, did I mention that the old sprinker pipe is a little bigger than the current version of a 1" pipe? That means that fittings are a little small, and they like to leak, well, only when you want to run the sprinklers anyway.
I thought about it and decided to try wrapping the fitting with white teflon plummer tape that is used regular threaded pipes. It worked! No leaks, well at least none that I could see before I covered it up with concrete from the new gate post that is right beside it.
With the sprinkler pipe connected, it was time to rebuild the block retaining wall, which happily, went together just like it should.
Now with that done, and the new gate and fence posts in place, it was time to rebuild the gate and then put up the fence. Funny thing about the gate. I measured carefully (the new gate is a few inches narrower than the old one because of the concrete on one side and the sprinkler lines on the other), and cut the wood and assembled the gate. It was a work of art and I was pleased right up to the time I took it out to fit it to the gate posts. I had failed to figure in the space taken up by the hinges and it was too wide. About that time I was happy that I had put it together with screws, because just like I had screwed it together, I could take it apart and shorten the cross pieces. The second time was a perfect fit, well, if you don't count that I still ended up using a planer to make it just a little narrower.
Then it was the fence, and then the redwood stain. By mid afternoon, it was up and done and thank goodness for that.
Next week it will be more of digging and extending the new retaining wall. But the good news about that is that when I get it done we will be ready to get bids for the concrete work and have the new and wider driveway.
Looks good Dad! I see you also got that old stump and root ball out of the way. Maybe by the time I get home there'll be a shiny new camper parked on a shiny new driveway...
ReplyDelete